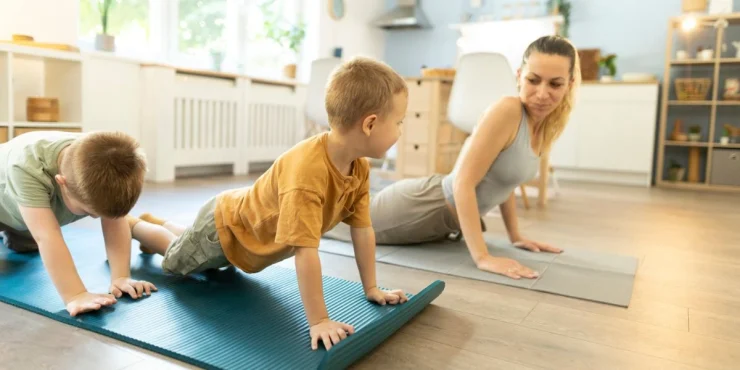
Recovery is just as vital as the workout itself, and I’ve come to rely on a practice that combines the best of two worlds: my foam roller and yoga mat. Over time, I’ve built a foam roller and yoga combo routine that helps release tightness, reduce soreness, and reconnect with my breath. Whether it’s after a heavy lifting session, a long run, or just hours of desk work, this combo works wonders.
I don’t always have time for a full massage or a long class, but I’ve found that blending targeted foam rolling with slow, intentional yoga stretches is a game changer. The roller tackles the fascia and knots in muscles, while yoga helps integrate that release into fluid movement and calm breathing. This pairing has become my go-to method for recovery, mobility, and stress relief.
Let me walk you through how I structure this routine and why it’s such a powerful part of my wellness toolkit.
Why Combine Foam Rolling and Yoga?
Foam rolling helps break down adhesions in the fascia, which is the connective tissue that surrounds and supports muscles. It’s like a form of self-massage—sometimes intense, but highly effective. Yoga, on the other hand, stretches and lengthens the muscles, bringing mindfulness and breath into the mix.
The reason I rely on a foam roller and yoga combo routine is because they complement each other beautifully. Foam rolling prepares the body by loosening tight spots. Then, yoga helps elongate the muscles and deepen the effects of the release.
Rolling alone might feel relieving, but pairing it with movement and breath takes it to a whole new level. It turns passive recovery into active self-care.
Getting Started: What You’ll Need
To follow along with this foam roller and yoga combo routine, you’ll need just a few simple items:
- A standard foam roller (medium-density is best for general use)
- A yoga mat
- A yoga block (optional for support)
- Comfortable clothing and a quiet space
I like to set the mood with soft music or calming incense, but that part’s entirely optional. The goal is to create a comfortable space where your body feels safe to release and let go.
Begin with Breath and Body Scan
I always start by sitting quietly on my mat, closing my eyes, and taking a few deep breaths. I inhale through the nose, feeling my ribs expand, and exhale slowly through the mouth. This helps settle my nervous system and shifts my focus inward.
Then I mentally scan my body. I check in with my neck, shoulders, back, hips, legs—looking for any areas that feel tender, tight, or sore. This gives me clues on where to spend more time with the roller and which yoga poses might feel most beneficial.
Calves and Hamstrings: Roll First, Then Stretch
Starting with my lower body, I place the foam roller beneath my calves and gently roll back and forth from ankle to knee. I pause on any tender spots and hold for a few breaths. I do each leg separately so I can give more attention to the sides or angles that feel neglected.
Next, I target the hamstrings. I sit on the roller, support myself with my hands behind me, and roll from the knees up to the glutes. It’s important to go slow—fast rolling does less for deep tissue release.
After rolling, I move into a seated forward fold. I extend both legs in front, inhale to lengthen the spine, and exhale to hinge forward. I don’t force the stretch. I just breathe and allow the lengthening to happen gradually. The foam rolling helps soften the fascia so I can fold a little deeper without strain.
This part of the foam roller and yoga combo routine is especially helpful after runs or leg-intensive workouts. It keeps my posterior chain supple and strong.
Quads and Hip Flexors: Melt Away the Tension
Next, I roll over onto my stomach and place the foam roller beneath one thigh. I support myself on my elbows and slowly glide the roller from just above the knee to the top of the hip.
This is one of the more intense areas to roll, so I take my time and avoid holding my breath. If I find a knot or tender area, I pause and let the pressure do its work while I breathe into the sensation.
After working both thighs, I transition into low lunge. With one foot forward and the back knee on the mat, I sink my hips down and lift my chest. I stay for five to eight breaths on each side, focusing on releasing the front of the hips and thighs.
I can really feel the difference here. The roller breaks up the stiffness, and the lunge allows the tissue to open with length. This combination always leaves my hip flexors feeling loose and refreshed.
IT Bands and Outer Hips: Target and Release
Rolling the IT band can be intense, but it’s incredibly effective for reducing tension in the outer thigh. I lie on my side with the roller under my hip and gently roll down toward the knee. I keep the top leg bent for support and use my arms to control the pressure.
When I find a tight spot—which is often—I pause and take five slow breaths. It’s tempting to avoid this area, but I’ve found it’s where I store a lot of stress from cycling or sitting too long.
After both sides, I shift into pigeon pose to open the outer hips. I bring one knee forward and extend the opposite leg behind, letting my hips square and chest fold over. I stay for about a minute per side, breathing slowly and evenly.
This part of the foam roller and yoga combo routine is pure gold for hip tension. It opens up both the muscles and the emotional layers we often carry there.
Glutes and Lower Back: Unwind Deeply
Sitting on the roller again, I cross one ankle over the opposite knee in a figure-four position. I tilt slightly toward the leg that’s crossed and begin rolling over the glutes. This move hits the piriformis and deeper hip rotators that often contribute to back pain.
Once I’ve worked both sides, I lie on my back and hug my knees to my chest. Then, I move into a gentle supine twist—dropping both knees to one side while keeping the shoulders grounded.
This twist helps realign the spine and provides relief for the lower back. Rolling first helps create space, and the twist deepens the sense of release.
Upper Back and Shoulders: Open and Restore
For the upper body, I start by lying back on the roller, positioning it across the mid-back. I support my head with my hands and slowly roll up and down the thoracic spine. I avoid the neck and lower back, focusing on the space between the shoulder blades.
Next, I place the roller vertically along my spine and lie on it lengthwise, with my head and tailbone supported. I open my arms to the sides like a cactus and just breathe. This passive chest opener is one of my favorite parts of the foam roller and yoga combo routine.
To follow up, I transition to thread-the-needle pose. From hands and knees, I slide one arm under the other and rest my shoulder and head on the mat. It’s a gentle way to release the upper back and invite rotation into the spine.
Finishing with Stillness
After moving through each area, I return to my breath. I lie on my back in savasana, maybe with a bolster under my knees or a rolled blanket under my neck. I let the work settle.
This is where the true healing happens. The foam rolling clears the knots, yoga opens the lines of energy, and rest allows the integration. I stay here for five to ten minutes, simply breathing and observing how I feel.
Making It a Habit
I don’t wait for soreness to hit before I do this. I make the foam roller and yoga combo routine a regular part of my week. Even just twice a week can make a massive difference in how I recover and perform.
Sometimes I do a full 30-minute session. Other days, I pick two or three target areas and spend 10 minutes. It’s flexible, intuitive, and doesn’t require perfection.
The key is consistency and breath. The more I practice this, the more I notice the small signals my body sends—before they become pain or injury.
Why This Routine Works
The reason this combo is so effective is because it tackles the body on multiple levels. Foam rolling works on the myofascial layer, breaking up adhesions and increasing circulation. Yoga works on flexibility, joint alignment, and mental focus.
Together, they create a dynamic and holistic recovery strategy. I move better, sleep better, and feel less anxious when I’ve taken the time to care for my body in this way.
The foam roller and yoga combo routine doesn’t require a gym, a teacher, or fancy equipment. Just a mat, a roller, and a willingness to breathe through discomfort and into healing.
Final Thoughts
If you’re looking to improve your mobility, recover faster from workouts, or simply release the tension of everyday life, I highly recommend building your own foam roller and yoga combo routine. It’s become one of the most important rituals in my self-care practice.
What started as an experiment has turned into a foundational part of my wellness. It’s low-impact, deeply restorative, and surprisingly meditative. I no longer separate recovery from mindfulness—it’s all one practice.
This routine is your invitation to slow down, listen closely, and honor your body in a new way. The benefits go beyond flexibility or performance. They extend into how you feel, move, and show up every day.
My Go-To Gear for This Routine
As an Amazon Associate, I earn from qualifying purchases. This comes at no extra cost to you.
🧘♀️ Foam roller: This one works great on my tight spots.
🕉️ Yoga Mat: This one not only goes to yoga class with me but on meditation retreats as well.
🟧 Yoga Block: This block supports and looks pretty!


Add comment